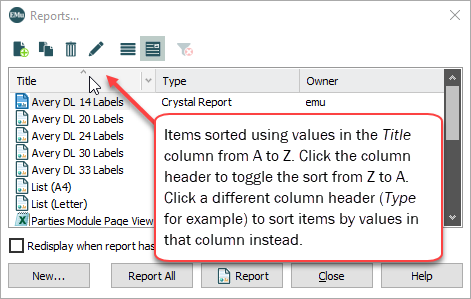
Dialog boxes are accessed frequently when using
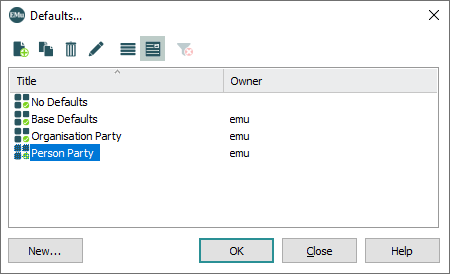
The properties of items listed in a dialog box can be viewed by selecting the item and then selecting the Properties  button. See Properties boxes for details.
To run an item listed in a dialog box:
- Select the item and click OK
-OR-
Double-click the item.
|
Button |
Name |
Description |
|---|---|---|
|
|
New |
Click to add a new item to the dialog box. A properties box will display enabling you to configure the new item. In this case, a Defaults Properties box would display, enabling you to create and configure a set of default values. When a new item is created, its name will display in the dialog box listed alphabetically under the Title heading. |
|
|
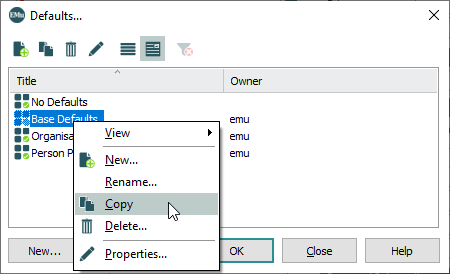
Make a copy of an item. With this option it is possible to copy an existing item (- Copy is appended to the name) and then modify the copy's properties. This can be a quick and efficient way to create a new item. Tip: When copying a report list item (in the Reports dialog box), the report file is also copied and automatically assigned a new name. Note: This option is not available in all dialog boxes where it is not useful or not desirable (it is not available in Ditto, Exports, Group, Global Replace for instance). |
|
|
|
Select an item in the box (e.g. Base Defaults in the image above) and click |
|
|
|
Properties |
Select an item in the box (e.g. Base Defaults in the image above) and click In this case, a Defaults Properties box for Base Defaults would display, enabling you to view its settings and change them as necessary. |
|
|
List |
Click to view the items in the box as a list. |
|
|
Details |
Click to view the items in the box with more details. In this view, the owner (typically the creator) of the item is listed under the Owner heading. Typically only the owner of an item is able to modify it (unless permissions have been provided to other users in the item's properties box). |
|
|
Clear Filter |
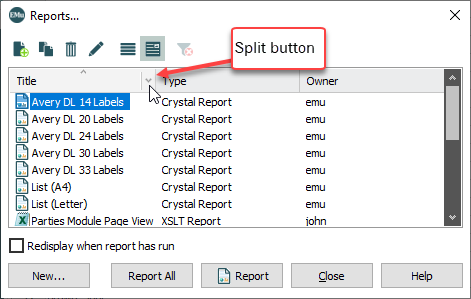
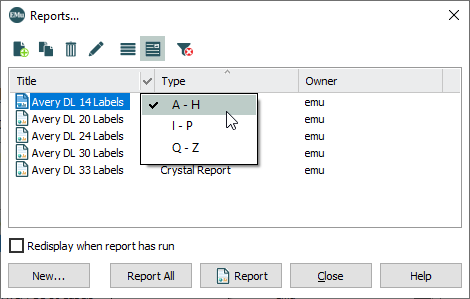
Clear filters and display all items listed in the dialog box. A filter can be used to display a subset of items listed in a dialog box, which can be useful when many items are listed: Placing the cursor over a column header will display a Split button:
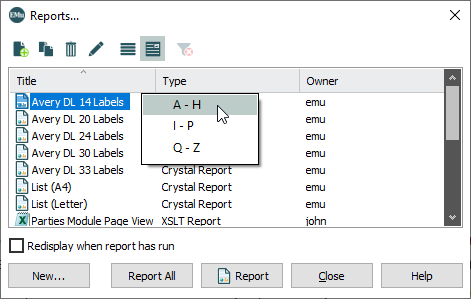
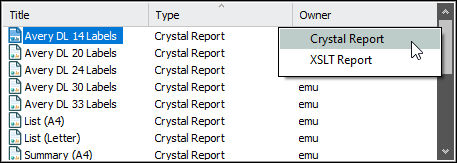
Clicking the button displays a list of filter values:
Filter values are either:
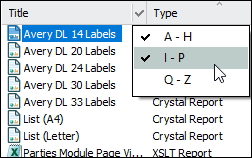
Select a filter value to list matching items and conceal all others. For example:
More than one filter value can be selected for a column, e.g.:
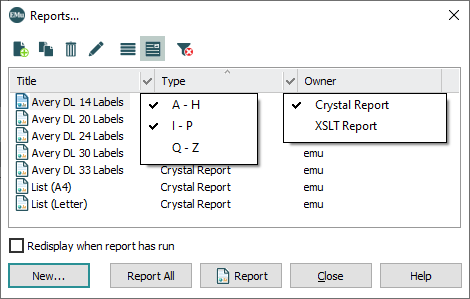
and, more than one column can have a filter. In this example a filter is applied to the Title column and to the Type column, and only items which match both filters will be listed:
Note: This is a manipulated image for the purposes of illustration, and it is only possible to display filter values in one column at a time. Note that when a filter value has been selected:
|
|
|
Sort |
By default, items listed in a dialog box are sorted by values in the first column from lowest to highest (e.g. A to Z). An arrow head in a column header indicates:
Items can be sorted on values in any column. Clicking the Owner header would sort items by the creator of reports in this example. The direction of the sort can be reversed by clicking a column header. In this example, clicking the Title header will reverse the sort and the arrow head will change to |
|
|
OK |
Select an item in the box (e.g. Base Defaults in the image above) to activate it. The dialog box will close. |
|
|
Close |
Close the dialog box without activating an item. |
|
|
Help |
Display the |
Right-click an item in a dialog box to display a menu with a list of all available commands:
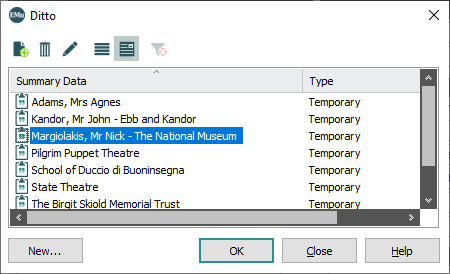
With the Ditto tool it is possible to copy data from:
- One field in a record into the same field in another record.
- A tab in a record into the same tab in another record.
- All fields in a record into another record.
The Ditto box is accessed by selecting Select Record (Ditto) on the Edit tab of a module Ribbon:
|
Button |
Name |
Description |
|---|---|---|
|
|
New |
Note: See The Ditto utility for details.
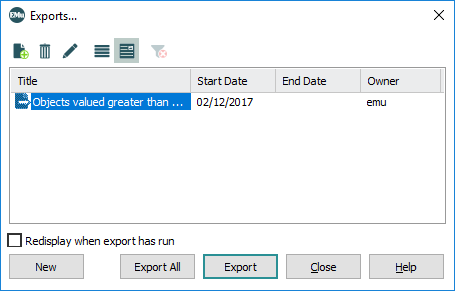
The Exports box includes a list of predefined exports. The list includes the export name, scheduled start and end dates and the name of the owner of the export (who created it).
The Scheduled Exports facility allows you to have data exports occur at defined date intervals. It may also be useful to perform a data export immediately rather than at the scheduled time. In this case, we generate the export data by running the export manually using the Export All or Export buttons. These manual runs are known as Unscheduled Exports.
The Exports box is accessed by selecting Export on the Tools tab of a module Ribbon:
|
Button |
Name |
Description |
|---|---|---|
|
|
New |
Click to set up an export schedule. |
|
|
Export All |
Click to run the export manually against all listed records. |
|
|
Export |
Click to run the export manually against the current |
|
|
Redisplay when export has run |
Check this box to redisplay the Exports box when the scheduled export has run. |
Note: See Scheduled Exports for details.
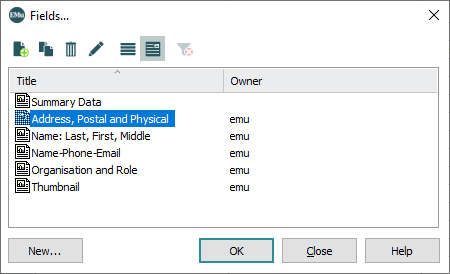
The Fields box displays a list of available List Views and can be used to create a new List View.
The Fields box is accessed by selecting Choose (List Settings) on the View tab of a module Ribbon:
|
Button |
Name |
Description |
|---|---|---|
|
|
New |
Click to create a List View. |
Note: See List View for details.
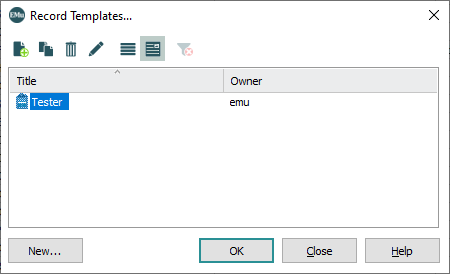
The Record Template utility can be used to create a batch of records based on an existing record.
The Record Templates box is accessed by selecting Templates on the Tools tab of a module Ribbon:
|
Button |
Name |
Description |
|---|---|---|
|
|
New |
Click to create a Record Template. |
Note: See Record Templates for details.
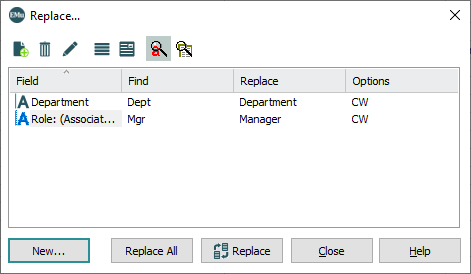
The Global Replace tool permits authorized users to replace a value in one or more fields in a set of records with a different value.
The Replace box is accessed by selecting Replace on the Edit tab of a module Ribbon:
Note:
The Replace box works differently to other dialog boxes: all substitutions defined in the current session and displaying in the Replace box will be run when either Replace or Replace All is selected. It is not possible to select just one substitution from the list to run.
See Global Replace for details.
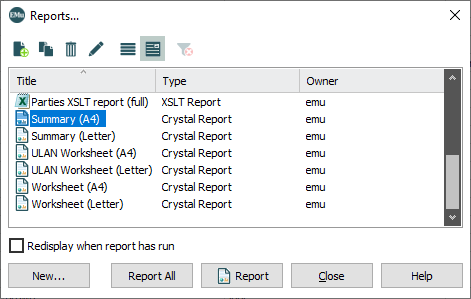
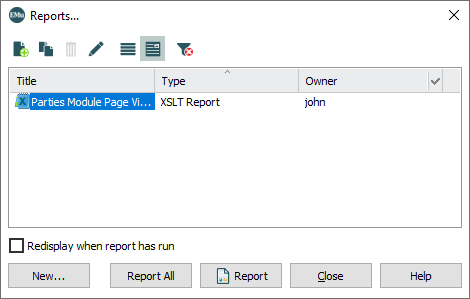
A Reports box includes a list of predefined reports. The list includes the report name, its Type and the name of the owner of the report (who created it).
Note:
Only the owner of a report is able to modify it. However, using the Copy option  to copy a report listed in the Reports dialog box, changes ownership of the copied item to the current user.
The Reports box is accessed by selecting Reports on the Home tab of a module Ribbon:
|
Button |
Name |
Description |
|---|---|---|
|
|
New |
|
|
|
Report All |
Click to generate the selected report using all listed records. |
|
|
Report |
Click to generate the selected report using the current |
|
|
Redisplay when report has run |
Check this box to redisplay the Reports box when the report has run. |
Tip: When using the Copy option  to copy a report, the associated report file is also copied and automatically assigned a new name (the original report file name with a
 -copy suffix).
Note: See How to create and run reports for details.
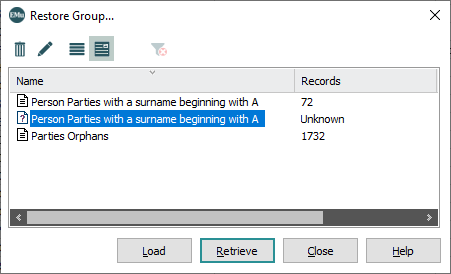
After a search has been run you may want to save the group of records returned so that you can access them again; or you may want to save the search criteria used to generate this group of records (especially if the search is quite involved). There are thus two types of group:
- A Static group (which is a set of records generated by a search).
A Static group can be identified by the
 icon beside the group name and the number of records in the Records column in the Group box
 - A Dynamic group (which is the search criteria used to generate a set of records).
A Dynamic group can be identified by the
 icon beside the group name and Unknown in the Records column in the Group box.
The Restore Group box is accessed by selecting Retrieve on the Tools tab of a module Ribbon:
|
Button |
Name |
Description |
|---|---|---|
|
|
Retrieve |
Click to retrieve records matching the search criteria for the group selected in the Restore Group box. |
|
|
Load |
Click to load and edit the saved search criteria for the dynamic group selected in the Restore Group box. Note: The Load button is disabled (grayed out) until a dynamic group is selected. |
Note: See Grouping records for details of working with groups.
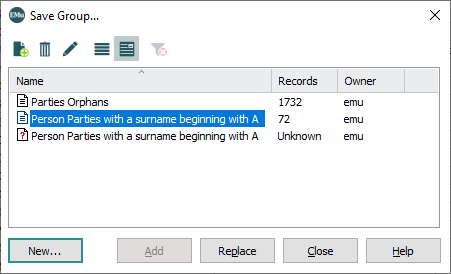
After a search has been run you may want to save the group of records returned so that you can access them again; or you may want to save the search criteria used to generate this group of records (especially if the search is quite involved). There are thus two types of group:
- A Static group (which is a set of records generated by a search).
A Static group can be identified by the
 icon beside the group name and the number of records in the Records column in the Group box.
 - A Dynamic group (which is the search criteria used to generate a set of records).
A Dynamic group can be identified by the
 icon beside the group name and Unknown in the Records column in the Group box.
The Save Group box is accessed differently for each type of group:
- For a Dynamic group, select Save Search (Groups) on the Tools tab of a module Ribbon.
- For a Static group, select Add (Groups) on the Tools tab of a module Ribbon.
|
Button |
Name |
Description |
|---|---|---|
|
|
New |
Click to create a new group. |
|
|
Add |
Click to add one or more records to an existing Static group. Note: This button is only active when a static group is selected as it is not possible to add records to a dynamic group. |
|
|
Replace |
Replace is used to replace the records in a Static group with a new set of records or to replace the search terms used to generate a Dynamic group. |
Note: See Grouping records for details of working with groups.
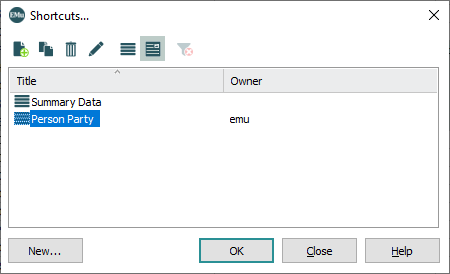
A Shortcuts View displays a list of fields and their values in a pane on the left side of a module window. The values displayed in the pane are for the current record.
The Shortcuts box is accessed by selecting Choose (Shortcut Settings) on the View tab of a module Ribbon:
|
Button |
Name |
Description |
|---|---|---|
|
|
New |
Click to create a Shortcuts View. |
Note: See Shortcuts View for details.
A group of records can be sorted on any and all fields in a module (with the exception of nested table fields). It is possible to select a predefined sort or specify exactly how a group of search results will be sorted. It is possible to save sort criteria for re-use.
It is possible to:
- Sort records on multiple fields, e.g. by Last name, and then First name.
- Sort in both ascending or descending order (e.g. A to Z, Z to A).
- Save your own sort criteria to be used with other results sets.
- Assign permissions to other users to use your saved sort criteria.
- Specify that a Sort will run automatically following a search.
An automatic Sort is highlighted (bold) in the Sort box.
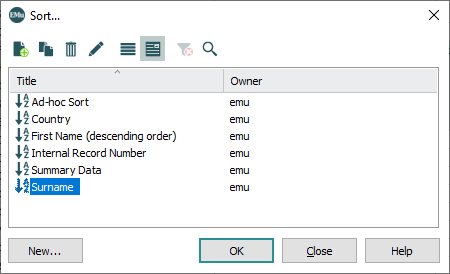
The Sort box contains a list of predefined sorts. It is accessed by selecting Sort on the Home or Tools tab of a module Ribbon:
|
Button |
Name |
Description |
|---|---|---|
|
|
New |
Click to specify a new sort. |
Note: See Sorting records for details.



 .
.
